
Fast Track Sailing in the Salcombe Estuary - Getting into and out of the 'Bag'
by Malcolm Mackley 15 Apr 2020 11:25 BST
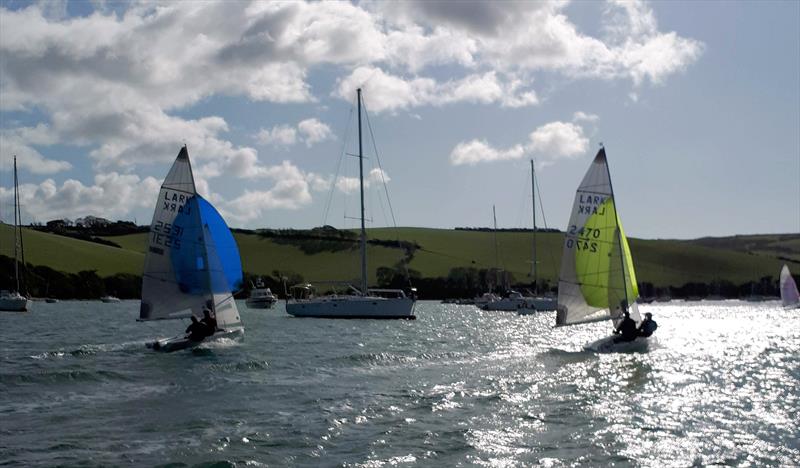
Lark Masters at Salcombe © Graham Cranford Smith
Malcolm Mackley has written up his observations from many years of watching the racing at Salcombe in Devon, UK.
The Salcombe estuary offers huge challenges for sailboat racing and over the last hundred years yachts, Salcombe Yawls and now dinghies have taken on the challenge in what is one of the UK's most beautiful estuaries. The "race track" at Salcombe involves race marks strategically located around the estuary and nearly every race has the feeling of undertaking a journey to different locations surrounded by golden beaches, precarious rock formations, magnificent farmland, complex creeks and usually a serious tide. This short article describes some of the options of "Going through the bag", a notorious area of the race track.
Getting into and out of the "Bag"
For many sailors the Salcombe estuary "Bag" is casino lottery sailing, shrouded in mystery and chance, however the regular top sailors seem always to do well here. This is not luck, it is that they have learnt the fast track way into and out of the Bag. "Stuff happens" in the Bag, but often it's the way you get into and out of this intriguing area that makes the difference.
There are far too many combinations and permutations of wind and tidal conditions to attempt a comprehensive account of events in the Bag and so only one set of conditions, that occur quite regularly, will be examined. Imagine a strong falling (ebbing) tide, marked by black arrows on the map and a wind with a Westerly component coming over the Snapes headland. Imagine you are positioned at point S off Whitestrand in relatively slack water and you are now fighting the tide heading towards the entrance of the Bag between Snapes and Scoble Points.
The broad red line indicates the "fast track" route, with two "pinch zone" circles; one in yellow at Snapes Point and one in blue off Tosnos Point. The pinch zones are the critical regions of the course into and out of the Bag and are the sheltered regions where the wind is lightest and changeable in direction and where maximum concentration is required, in fact concentration on wind direction, strength and tide strength are key factors to be alert to at all times.
As you approach Snapes Point the wind will be either coming from the estuary or funnelling down from Batson Creek and this might influence how close you elect to go to the Snapes shore when approaching the first Yellow pinch zone. Almost invariably at some point in the yellow zone you will lose the estuary breeze as shown for example in the photo above and then be looking for the "new" Westerly wind in the Bag coming over Snapes headland.
The wind will drop and there may be an inevitable temptation to stand up in the boat in order to gain an extra bit of momentum to help you to the breeze that is tantalisingly waiting for you in the entrance of the Bag. Remember the wind will be much lighter in the yellow zone and so sail adjustment such as kicker tension might be necessary. There will be a clear tide line in the yellow zone and once in the tide you will be swept away from your preferred destination which is towards the tidal shelter of the moored boats on the opposite shore between Scoble Point and Ox Point.
There can be an irresistible "pure greed" temptation to take the direct green route to Ox Point. Taking the more direct short route can pay off, particularly if you have identified a useful puff of wind to get you through the Yellow zone, however in general the green route can end in disaster if the wind drops. Whatever route you finally choose in the yellow zone you need to keep the boat moving and be alert to other boats, wind patches and tidal strength. Strategic gains can be important and losses disastrous.
There is an alternative route into the Bag via the Portlemouth shore shown as blue on the map. Experienced Salcombe Solo sailor Simon (Yotter) Yates is sometimes to be found negotiating this passage with success, he also sometimes starts on the red track and then drops down to the blue.
From Ox point (surprisingly?) the fast track red route is to cross the tide again and head towards the slacker waters around the visitors pontoons. The red route then has options as to whether you stay on the channel side of the full pontoon line or sneak inside the pontoons. Whatever route you take you will end up at the next Blue pinch zone which is Tosnos Point. The choice here is to go high or low. Again there is a temptation to take the purple high road marked on the map, however the red route to Halwell Point, where yet again you cross the tide, is usually the best and safest option.
Tosnos and the Snapes pinch zones have similar characteristics. The wind goes light and you must try to keep the boat moving through these very, very tricky sectors. Maximum concentration, patience and awareness are all necessary. The two Yawls shown in the photo below are seen leaving the blue Tosnos pinch zone and are approaching Dendridge pontoons. The yellow Yawl appears to be taking a "high" purple route out of the Bag to Gerston, whilst the dark coloured Yawl looks set to take the red route to Halwell Point and then Gerston.
This is a key moment and unfortunately I am unable to report which of the two options in this instance paid greatest reward. What I can say is that the photo was taken on a glorious day where the estuary was looking at its best and it was pleasure just to be there.
If you are not a tide-crossing enthusiast there is an alternative route from Ox Point to Halwell Point shown as brown on the map. This "pretty" low route can work on occasions and again Yotter Yates can often be seen successfully negotiating this path.
The Bag is an astonishing place to sail and a region where massive gains and losses can be made. It is part of the estuary that makes Salcombe so challenging, yet at the same time addictive!