Edition


Boats for sale
| Laser 140101 Tynemouth |
 |
| Rossiter Pintail Mortagne sur Gironde, near Bordeaux |
 |
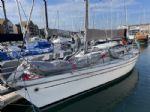
| Laser 28 - Excellent example of this great design Hamble le rice |
 |
List classes of boat for sale |


RS200 control lines |
Post Reply 
|
| Author |
 Printable Version Printable Version Delicious Delicious Digg Digg Facebook Facebook Furl Furl Google Google MySpace MySpace Newsvine Newsvine reddit reddit StumbleUpon Translate StumbleUpon Translate Twitter Twitter Windows Live Windows Live Yahoo Bookmarks Yahoo Bookmarks Topic Search Topic Search  Topic Options Topic Options
|
laser193713 
Really should get out more 
Joined: 13 May 09 Location: United Kingdom Online Status: Offline Posts: 889 |
 Post Options Post Options
 Quote Reply Quote Reply
 Topic: RS200 control lines Topic: RS200 control linesPosted: 08 Aug 13 at 2:34pm |
|
Just about to re-rope my 200. The previous owner didn't do a brilliant job of looking after her so after a full job on the bottom of the boat it is time to do the fun bit, pimping!
Anyway... obviously the 16:1 continuous kicker is a must... got that mostly covered. How is best to hide the extra rope? I was thinking a couple of through deck eyes in the thwart and an elastic takeup system forwards either side of the centreboard case, having looked again it all gets a bit crowded up there so where is the best place to route the extra rope? Same with the cunningham, this will be continuous too. Where does the extra rope go? Also, do you really need 8:1, it has 4:1 at the moment which is what I had on my 100 and that seemed alright. How do you get 8:1 without an incredible amount of clutter up by the mast? Lastly, any other must have pimping ideas? I have read all the guides online but most are dated 2002 etc... not much up to date stuff around.
|
|
 |
|
|
fab100
Really should get out more
Joined: 15 Mar 11 Online Status: Offline Posts: 1005 |
Post Options
Quote Reply
Posted: 08 Aug 13 at 7:25pm |
|
Elasticate the forestay
Use a quick-link not a shackle on the jib tack (stops the sheet catching) Elastic from chainplate to grab rail to fold kite-sheets under and keep em tidy If the boom jumps off the gooseneck on a light wind gybe (old goosenecks were too short) drill a hole thru boom and g-neck for a split pin Use a sail-slug (like on the clew) to attach mainsail tack to mast Make sure the pole goes all the way out and the tack is tight to the pole when it is Mark the kite halyard so the crew can tell when its up Elasticate the bung so it does not block the bailer when you want it open Finally for now, make sure the slot gaskets are not knackered - if so, brakes are on
Edited by fab100 - 08 Aug 13 at 7:26pm |
|
|
|
|
laser193713
Really should get out more
Joined: 13 May 09 Location: United Kingdom Online Status: Offline Posts: 889 |
Post Options
Quote Reply
Posted: 08 Aug 13 at 10:02pm |
|
Elastic forestay is sorted, fitted a new gooseneck already. Sail slug sorted. Marks on halyard will be a job for next time. I use a soft shackle on the tack, two lengths to choose from. Bung already elastic.
Main issue is where to run control lines... Edited by laser193713 - 08 Aug 13 at 10:04pm |
|
|
|
|
Stevie_GTI
Posting king 
Joined: 21 Oct 08 Online Status: Offline Posts: 134 |
Post Options
Quote Reply
Posted: 08 Aug 13 at 11:57pm |
|
Not 100% on the class rules, but I would check them before you go adding extra fittings to route your take up systems on the control lines.
Edited by Stevie_GTI - 08 Aug 13 at 11:58pm |
|
|
|
|
laser193713
Really should get out more
Joined: 13 May 09 Location: United Kingdom Online Status: Offline Posts: 889 |
Post Options
Quote Reply
Posted: 09 Aug 13 at 8:58am |
|
You are allowed to drill a number of holes, cant remember exactly, think it is 4, they can be up to 13mm inside diameter and can have low friction bushes put into them.
|
|
|
|
|
laser193713
Really should get out more
Joined: 13 May 09 Location: United Kingdom Online Status: Offline Posts: 889 |
Post Options
Quote Reply
Posted: 09 Aug 13 at 9:02am |
|
1.3.19 A maximum of four additional holes, no larger than 13mm in diameter (excluding inserts or bushes), are permitted in the thwart moulding for passing or terminating control lines. 1.3.20 The order of reeving and the termination of control lines is optional the lines may be lead to handles, bushes, eyes or small stowage bags, simple elastic take-ups are permitted provided they are incorporated under the thwart moulding Incorporated under the thwart moulding...? That doesnt give much scope!
|
|
|
|
|
GybeFunny
Far too distracted from work 
Joined: 27 Oct 09 Online Status: Offline Posts: 403 |
Post Options
Quote Reply
Posted: 09 Aug 13 at 3:57pm |
|
I found an elastic takeup wasnt really necessary with a 16:1 kicker but I ran my rop over the thwart, however you could go for a 12:1 kicker which will mean less rope, you will just have to find a way of strengthening your forearms to make life easier ;-)
There was a thread not so long ago where it was suggested that by running the kicker from the grab rail, over the front of the thwart, under it and across in front of the mainsheet block then under the wart on the other side (hard to describe) then this means the excess rope doesnt afll back into the boat as much. Try doing a search.
Even if it were legal running the takeups along the centreboard case it would get right in the crews way, still better in the crews way than the helm eh?!! |
|
|
|
|
Post Reply
|
| Forum Jump | Forum Permissions You cannot post new topics in this forum You cannot reply to topics in this forum You cannot delete your posts in this forum You cannot edit your posts in this forum You cannot create polls in this forum You cannot vote in polls in this forum |
Bulletin Board Software by Web Wiz Forums® version 9.665y
Copyright ©2001-2010 Web Wiz
Change your personal settings, or read our privacy policy
Copyright ©2001-2010 Web Wiz
Change your personal settings, or read our privacy policy