Daggerboard repair
Printed From: Yachts and Yachting Online
Category: General
Forum Name: Repair & maintenance
Forum Discription: Questions & tips on the subject
URL: http://www.yachtsandyachting.com/forum/forum_posts.asp?TID=2888
Printed Date: 13 Aug 25 at 9:58pm
Software Version: Web Wiz Forums 9.665y - http://www.webwizforums.com
Topic: Daggerboard repair
Posted By: Adam.s
Subject: Daggerboard repair
Date Posted: 22 Apr 07 at 7:58pm
|
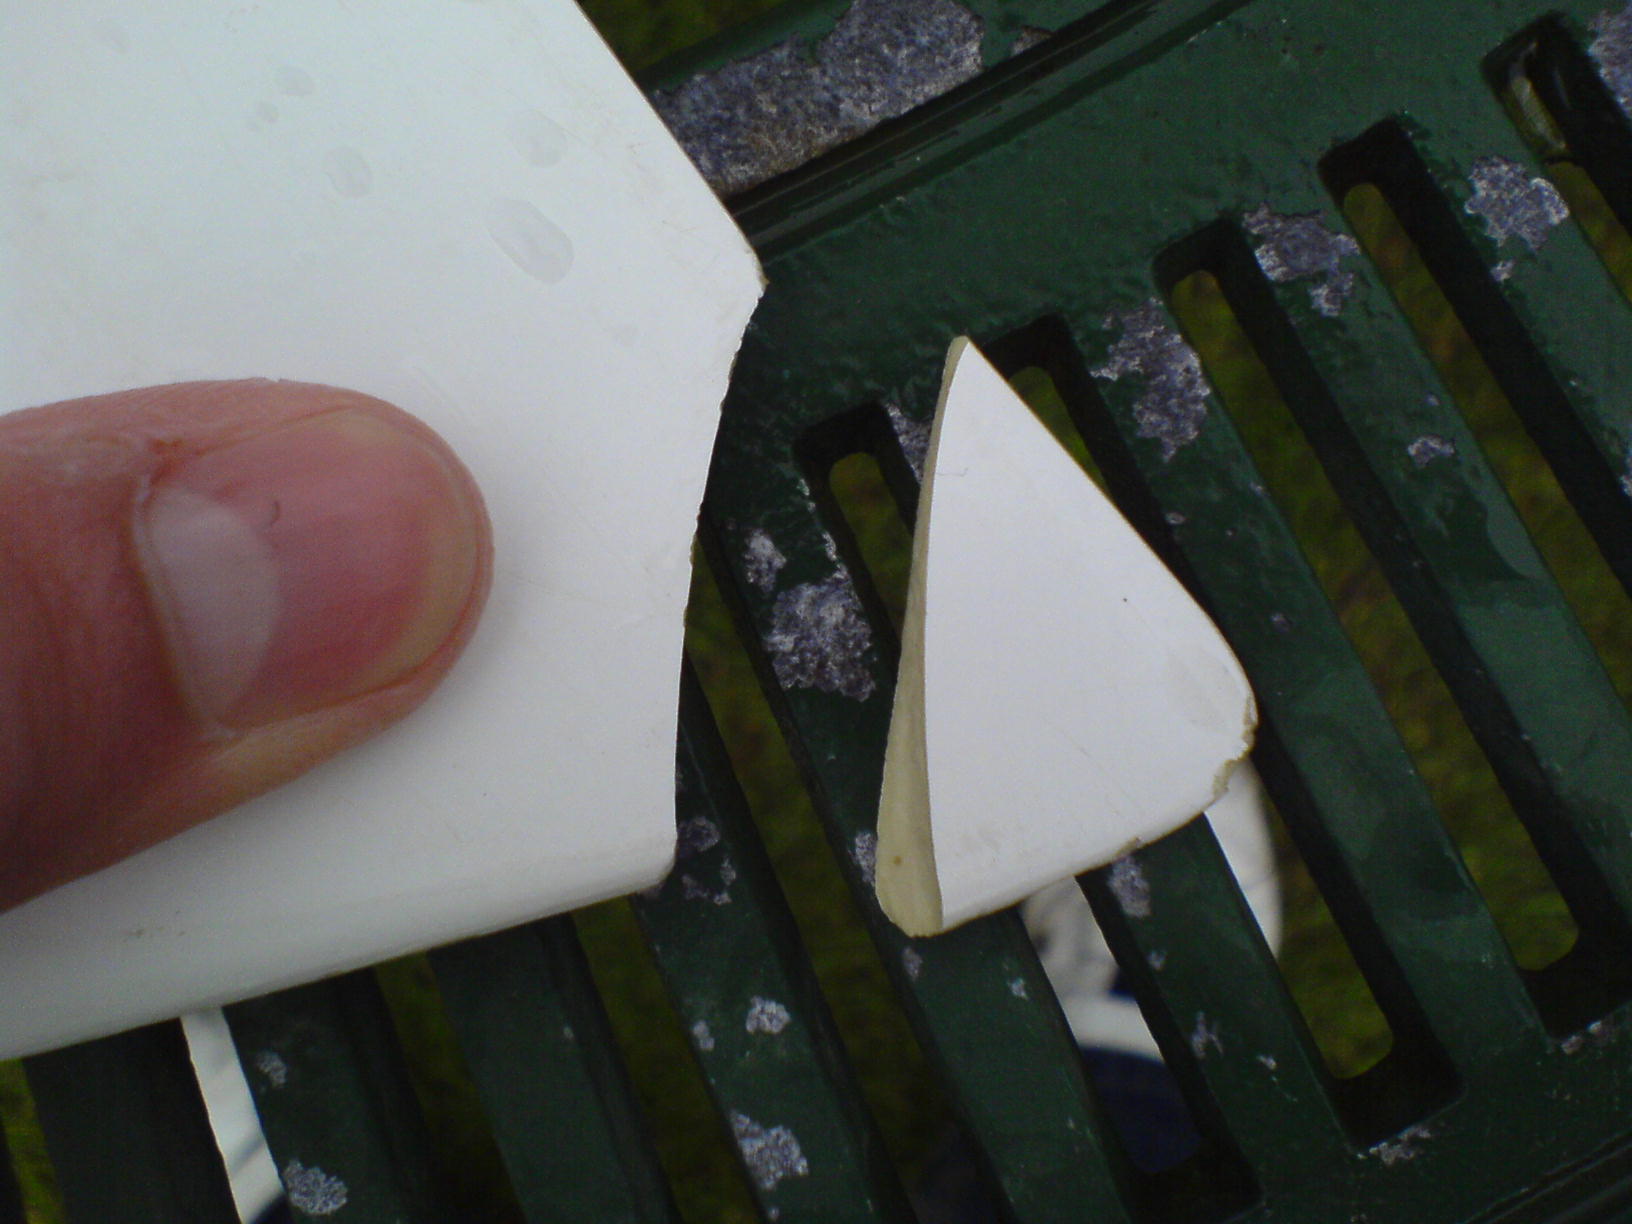
Today i put to much weight on the corner of my board and it went snappy, any ideas of how it fix it, luckly i saw the broken bit floating next to me
|
Replies:
Posted By: JimC
Date Posted: 22 Apr 07 at 8:02pm
| Glue it on with araldite! |
Posted By: Strawberry
Date Posted: 22 Apr 07 at 8:16pm
|
Buy some epoxy resin from your local chandlers. Something like this: http://shop.pinbax.com/index.asp?selection=detailed&uid=4639&itemtitle=SP106 - Click Mix the epoxy with the hardner in the ratio according to the instructions. Be very precise with your amounts or it won't "go off". The best way to do this is with syringes. Mix into this some microfibres. Something like this: http://shop.pinbax.com/index.asp?selection=detailed&uid=4800&itemtitle=Microfibres - Click Mix in small amounts of microfibres until it is about the consistencty of toothpaste. Then use the mixture like glue to stick the two bits together. Use sandpaper to neaten it up. And Robert's your father's brother. ------------- Cherub 2649 "Dangerous Strawberry |
Posted By: radixon
Date Posted: 22 Apr 07 at 9:40pm
|
I did the same thing to my Laser cb, I got told that what you can also do is carefully drill into both sections so you can fit a small metal dowel into both bits so it has more to grip to. My repair that I did has still survived many years later. ------------- |
Posted By: redback
Date Posted: 22 Apr 07 at 11:38pm
| If you lose the corner you can do the following. Drill a pilot hole and insert a screw partly into the main board. Cut off the head and build up the corner to the original shape, with car body filler. Sandpaper and paint. The screw reinforces the corner so that it is less likley to break off again. |
Posted By: mike ellis
Date Posted: 23 Apr 07 at 4:56pm
|
yes the screw method does make it less likely to break off but it doesnt mean it wont. when i snapped the corner off at stokes bay in the winter (dry capsize was a little energetic and my left foot was a little too far back) i was a little suprised to find i had two self tappers sticking out the bottom of the obard and as i fell off it my drysuit caught and the left leg filled up with water and i found later i had a lovely deep cut in my shin. ------------- 600 732, will call it Sticks and Stones when i get round to it. Also International 14, 1318 |
 when i got home i took some sand paper to it and just filed the back to a smother shape. TBH you will hardly notice any performance difference with just a tiny nick out the back like that.
Posted By: MRJP BUZZ 585
Date Posted: 23 Apr 07 at 5:40pm
|
Do laser not have any specific rules about that?
------------- Josh Preater http://www.bu22.co.uk">  BUZZING IS FUN BUZZING IS FUN
|
Posted By: Jack Sparrow
Date Posted: 23 Apr 07 at 6:01pm
I'm suprised you haven't bled to death by now, I'd get down the hospital ASAP. Put the end of your thumb I can see in the picture inside tuperware box on top of a bag of frozen peas that should keep it fresh until the doctors can sew it back on! ------------- http://www.uk3-7class.org/index.html" rel="nofollow - Farr 3.7 Class Website https://www.facebook.com/groups/1092602470772759/" rel="nofollow - Farr 3.7 Building - Facebook Group |
Posted By: Jack Sparrow
Date Posted: 23 Apr 07 at 6:42pm
|
I may be better to try and make a 'biscuit cut' as you won't have much board for a screw. You can use small nails but this has been unsatifactory for me. You'll need a small rotary blade. Fair the tip back to square. Cut the slot with the rotary blade. Stick in the plate ( either a bit of laminate glass or metal plate ). Let that go off. Sand back the 90 degree edge you have stuck the plate into so there is more contact area for the filler. You can even dill some holes in the plate for a better mechanical key fi you want. And then fill and fair. Finish with some spray paint if yoy feel like it. 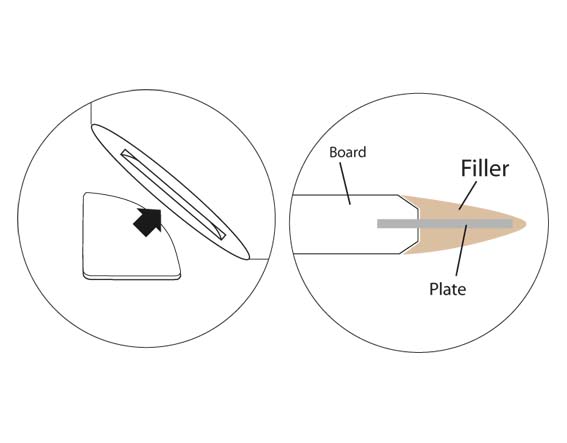 ------------- http://www.uk3-7class.org/index.html" rel="nofollow - Farr 3.7 Class Website https://www.facebook.com/groups/1092602470772759/" rel="nofollow - Farr 3.7 Building - Facebook Group |
Posted By: Ian29937
Date Posted: 24 Apr 07 at 12:11pm
|
I've done something similar but using a stainless bike spoke (15p from a decent bike shop) bent into a u shape, epoxied into two holes drilled into the board and then packed out to shape with filler. Worked a treat and no risk of exposed sharp metal if the repair fails.
Ian |

Posted By: Adam.s
Date Posted: 24 Apr 07 at 12:21pm
|
Thanks for all the advice i think im going to put two short metal rods one running parallel with the trailing edge and the another with the bottom of the board. Epoxy them in and epoxy the chunk to the main part of the board. ------------- |
Posted By: Jack Sparrow
Date Posted: 24 Apr 07 at 1:25pm
|
Sounds fair enough.
------------- http://www.uk3-7class.org/index.html" rel="nofollow - Farr 3.7 Class Website https://www.facebook.com/groups/1092602470772759/" rel="nofollow - Farr 3.7 Building - Facebook Group |
Posted By: Adam.s
Date Posted: 24 Apr 07 at 8:30pm
|
I have just finished attaching the broken off piece of foil. I am then going to fill a few of the scraps with gelcoat filler and i then plan to re spray with car primer. Now i am unsure of what sanding i will need to do, shall i give the whole foil a light sand and then spray plus do i need to sand after spraying. Plus how many coats of paint should i spray on, any help would be greatly appreciated! ------------- |
Posted By: mike ellis
Date Posted: 25 Apr 07 at 8:21pm
|
very bad idea to use gelcoat filler on the daggerboard, i seem to recall that from some other thread. use epoxy was the advice given then. ------------- 600 732, will call it Sticks and Stones when i get round to it. Also International 14, 1318 |
Posted By: Adam.s
Date Posted: 25 Apr 07 at 8:27pm
|
oo to late but in the end i used marine filler is that any good? ------------- |
Posted By: mike ellis
Date Posted: 25 Apr 07 at 9:09pm
|
ask time intheboat, heres what he said on another thread (dinghy development, page 2, gelcoat repair):
I've just spent some quality time with my boat and here's some top tips of things I wish had done. ------------- 600 732, will call it Sticks and Stones when i get round to it. Also International 14, 1318 |
Posted By: Adam.s
Date Posted: 25 Apr 07 at 9:23pm
|
ok thanks hopefully the filler will last ------------- |
Posted By: Paramedic
Date Posted: 25 Apr 07 at 11:42pm
|
What's the problem with gelcoat? If it's for coating purposes that's exactly what the board is coated with from new. Now that you've got the tip glued on, get some dawn grey gelcoat, sand the glueline so that there is a feelable dip, apply gelcoat wet & dry flat and the repair will be invisible. There is not really any need to paint. If your fussy you can probably put your marine filler (Adequate but perhaps untidy) right with this method. |
Posted By: Adam.s
Date Posted: 26 Apr 07 at 11:21am
|
Yeah i had a few other scratchs/grooves that i wanted to fix so i filled them to, so the board would look a bit patchy if i didn't spray it. im going to wet and dry the foil before spraying with like 1200 or 1500 then when i spray a coat do i have to wet and dry or wait until i've done all the painting. And how many coats should i give it? ------------- |
Posted By: mike ellis
Date Posted: 26 Apr 07 at 6:38pm
no idea im just repeating what ive heard. ------------- 600 732, will call it Sticks and Stones when i get round to it. Also International 14, 1318 |
Posted By: Paramedic
Date Posted: 27 Apr 07 at 6:17pm
|
Gelcoat is great at what it's intended to do - coat. People run into problems, or rather repairs that don't last, when they try to build up large missing chunks with gelcoat. It's not structural. However there is not really anything better to use to coat repairs especially to foils. Paint is too soft and tends to rub off on the inside of the boat leaving it a right mess, particularly with fixed rudders and daggerboards. I'd recommend damage to a gelcoated foil is always gelled not painted. As long as the repair is smooth, fair and polished it doesn't really matter what it looks like. |
Posted By: redback
Date Posted: 28 Apr 07 at 10:45pm
| If you are going to paint or spray don't sand with such fine wet&dry the paint won't key so well and will rub off in the case. I'd use something like to 240. There's no need to spray by the way, a brush will do and then rub down with 240, 360, 400 and 600. There's no point in going any finer if you don't mind a silky sheen and its supposed to be faster than polished. |
Posted By: JimC
Date Posted: 29 Apr 07 at 1:14am
Not by anyone who's actually done testing. |
Posted By: allanorton
Date Posted: 29 Apr 07 at 8:22am
|
I've always thought that a shiny, high plished finish is best, but recent pics. of americas cup boat keels seem to show a matt finish? ------------- |
Posted By: redback
Date Posted: 01 May 07 at 12:02am
| I know it doesn't apply to sailing boats but power boats entering speed events alway rough up the hull just aft of the bow. |
Posted By: mike ellis
Date Posted: 01 May 07 at 6:46pm
|
do you know why redback? ------------- 600 732, will call it Sticks and Stones when i get round to it. Also International 14, 1318 |
Posted By: BBSCFaithfull
Date Posted: 01 May 07 at 10:07pm
|
Umm cos the rough surface created a layer of airbubbles under the back of the boat or something ------------- Greatfully Sponsored By www.allgoodfun.com Int 14 GBR 1503!! |
Posted By: mike ellis
Date Posted: 02 May 07 at 5:25pm
|
so that would not work on a dinghy, far too slow. ------------- 600 732, will call it Sticks and Stones when i get round to it. Also International 14, 1318 |
Posted By: Jack Sparrow
Date Posted: 02 May 07 at 6:31pm
|
laminar flow. The skin friction is reduced by attaching a layer of water ( microns ) close to hull on which the rest of the water flows over. ------------- http://www.uk3-7class.org/index.html" rel="nofollow - Farr 3.7 Class Website https://www.facebook.com/groups/1092602470772759/" rel="nofollow - Farr 3.7 Building - Facebook Group |
Posted By: Jack Sparrow
Date Posted: 02 May 07 at 6:55pm
|
I would imagine the america's cuppers are using a riblet surface which would give a impression of a matt surface ( NASA invention ) most commonly seen on Sharks and Olympic Austrailan Swimmers with big feet. http://www.aerodyn.org/Drag/riblets.html Roughing the hull is essentially a poor mans version and you need to keep the scratches in line with the flow. ------------- http://www.uk3-7class.org/index.html" rel="nofollow - Farr 3.7 Class Website https://www.facebook.com/groups/1092602470772759/" rel="nofollow - Farr 3.7 Building - Facebook Group |
Posted By: Jack Sparrow
Date Posted: 02 May 07 at 7:07pm
|
Found this about Dennis Conner's - Stars & Stripes AC boat and the use of riblets if your interested - http://www.nasa.gov/centers/langley/news/factsheets/Riblets.html - clicky ------------- http://www.uk3-7class.org/index.html" rel="nofollow - Farr 3.7 Class Website https://www.facebook.com/groups/1092602470772759/" rel="nofollow - Farr 3.7 Building - Facebook Group |
Posted By: mike ellis
Date Posted: 02 May 07 at 7:23pm
|
thanks jack, that helped. it satisfied my curiosity ------------- 600 732, will call it Sticks and Stones when i get round to it. Also International 14, 1318 |